Trouble 22.1
Outage Maps
MACC is introducing Map displays for use in visualizing trouble outages. These network specific boundaries can be drawn using polygons or specific latitude and longitude coordinates in Customer Master. Company specified Trouble Ticket identifiers can be selected for inclusion on the map showing count and percent of areas out of service. These features will soon work in conjunction with MACC’s Web Self-Care product providing end-users a quick look at outages in their area. Companies that do not use MACC’s Web Self-Care can also take advantage of this feature using MACC’s API to access the Customer Master data for display on other self-care platforms. First, let’s discuss the set up needed for the outage map feature.
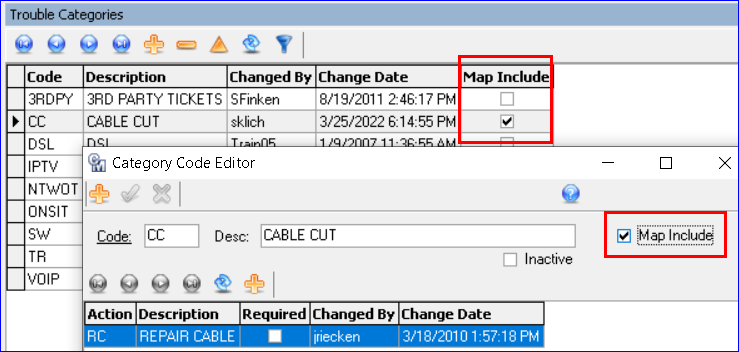
Trouble Suite | Maintenance: A “Map Include” checkbox was added to multiple Trouble editor screens. Checking the box will flag the Trouble information to be included in a new Trouble Outage map feature. A Map Include column was also added to the corresponding editor grids to indicate codes that will be included. The example shows the Map Include check box in the Trouble Categories editor and grid. They were also added to the following Trouble editors/grids in the Trouble Suite | Maintenance menu:
- Trouble Categories: Select all Trouble Category Codes to include on map
- Trouble Report Code: Select all Report Codes to include on map
- Prefix: Select all Prefixes to include on map
- Classes: Select all Classes Codes to include on map
- Priority: Select all Priority IDs to include on map
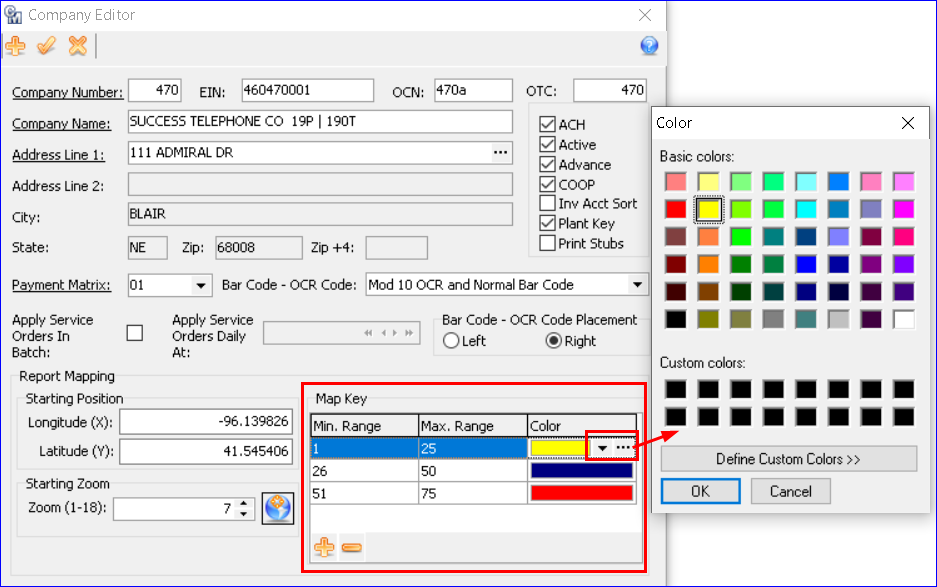
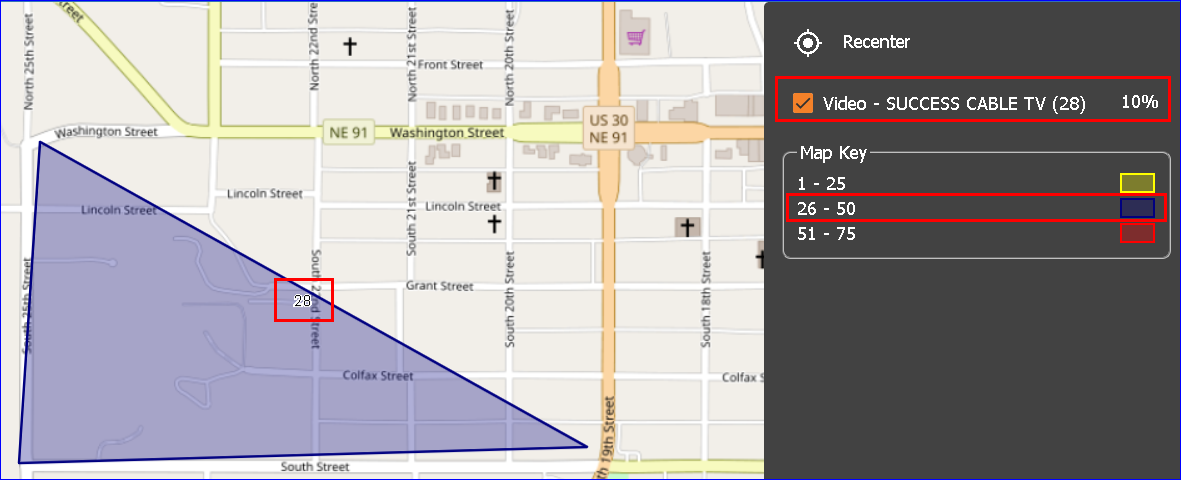
Maintenance | Common | Company | Company Editor: A Map Key grid was added to the Report Mapping group box in the Company Editor. It can be used to assign minimum and maximum range count information (number of Trouble Tickets per area) and a color for the range displayed on the Trouble Outage map. For example, if there are 1 to 25 Trouble calls reported in an outage, display the area as yellow on the map, 26 to 50 display the area as blue, and so on. The Color dropdown has standard color options to choose from and custom colors can be selected by clicking the ellipsis button. If colors are not set up for the ranges the Trouble areas will be defaulted to gray on the Trouble Outage map.
Maintenance | Mapping | Map Areas: A new menu item and screen for trouble outage mapping was added at Maintenance | Mapping | Map Areas. The menu item and screen will only be visible if the ‘Map It’ feature is activated in Customer Master. The Map Areas screen is used to map, or draw network specific boundaries using polygons or specific latitude and longitude coordinates. The areas drawn in this screen will then display on a new Trouble Outages map added to the Map It feature, and will show counts and/or percent of areas out of service.
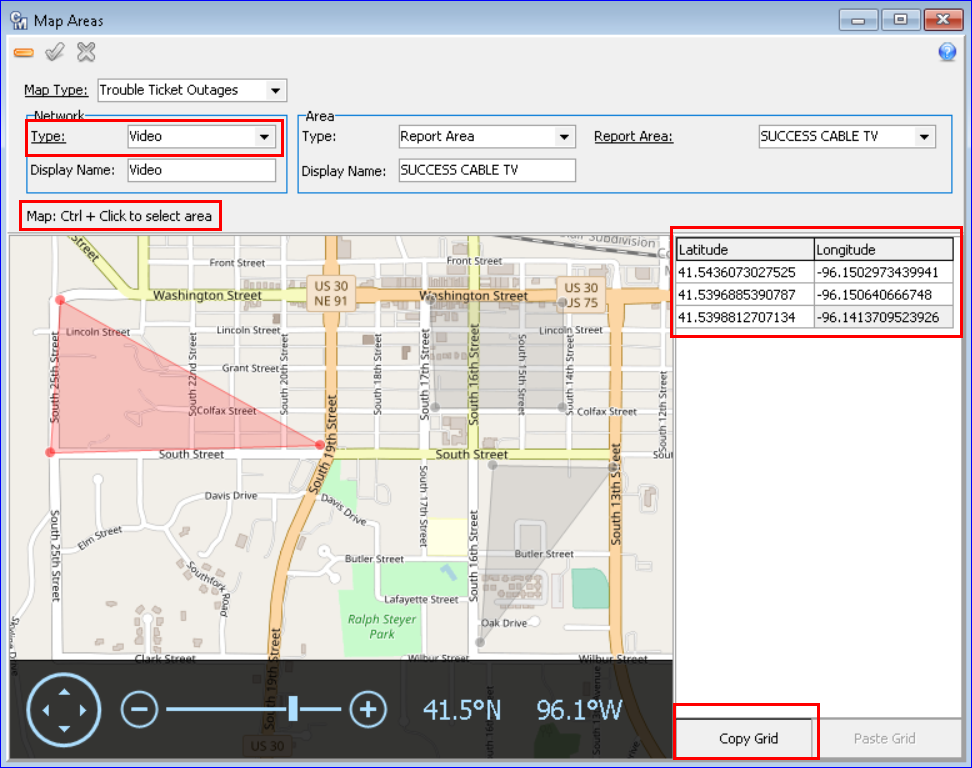
Company specified Trouble Ticket identifiers can be selected in the screen for inclusion on the map, such as Networks Types, and Area Types (Plant Area, Report Area, Service Area, Serving Equipment Area, or No Area Type.) The Map Type dropdown only contains Trouble Ticket Outages at this time, with plans for expansion in future releases. Multiple outage areas can be drawn on the map using a mouse. Red dots will appear where the user double-clicks on the map, and the area between the dots will fill in and be shaded red. The dots can be clicked on and moved if the area needs to be changed. Editing of existing points (red dots) on the map can also be accomplished by typing the Latitude and Longitude coordinates in the grid for the area you want to draw.
Once areas are drawn on the map, they can be copied with the Copy Grid button to create a new area. The “CTRL + Click to select area” memo instructs users how to select areas on the map. In the example, a Video, Internet, and Telephone outage area is drawn on the map. The selected Video area is highlighted red, which displays its Network and Area selections above the map, and the Latitude and Longitude coordinates in the grid on the right. The Internet and Telephone areas display in gray because they are not selected.
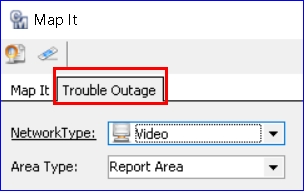
Web | Web Map It: Once all the set up in the maintenance tables and Map Areas screen is completed, the outage counts and percent of areas out of service can be viewed in the Map It feature. A “Trouble Outage” tab was added to the Map It screen. The Map It tab will continue to show the original Map It map, and the Trouble Outage tab will display the new Trouble Outage map. The Network Type dropdown will display networks users have mapped in the Maintenance | Mapping | Map Areas screen. When a Network Type is selected, the Area Type it was set up with will be populated. Selecting the View Map button will open the Trouble Outage map for viewing.
Companies utilizing MACC’s Web Self-Care product can soon use the Trouble Outage map feature to provide their end-users a quick look at outages in their area. Contact your Client Relations Manager if your company is interested in using Trouble Outage with Web Self Care or MACC’s API to access the Customer Master data for display on other self-care platforms.
View and Edit Custom Fields from Trouble Ticket
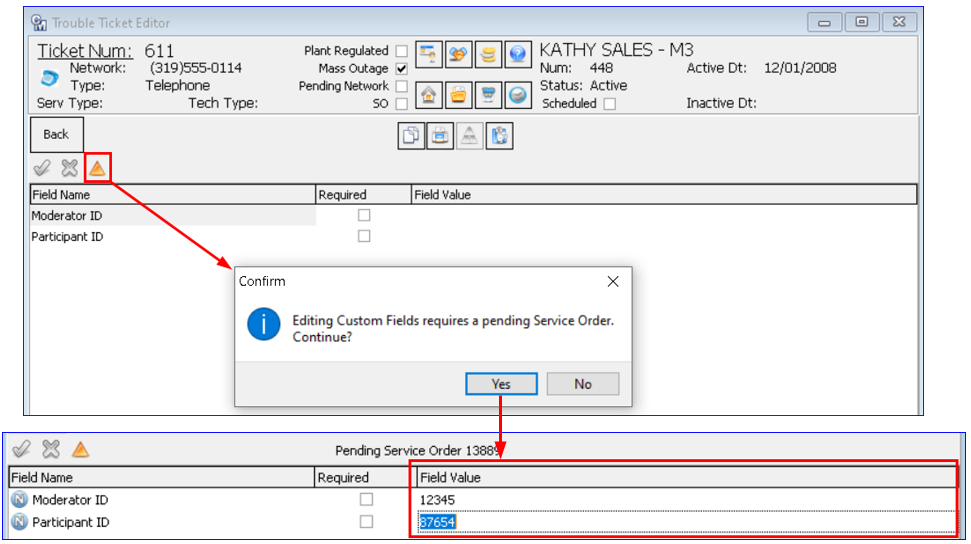
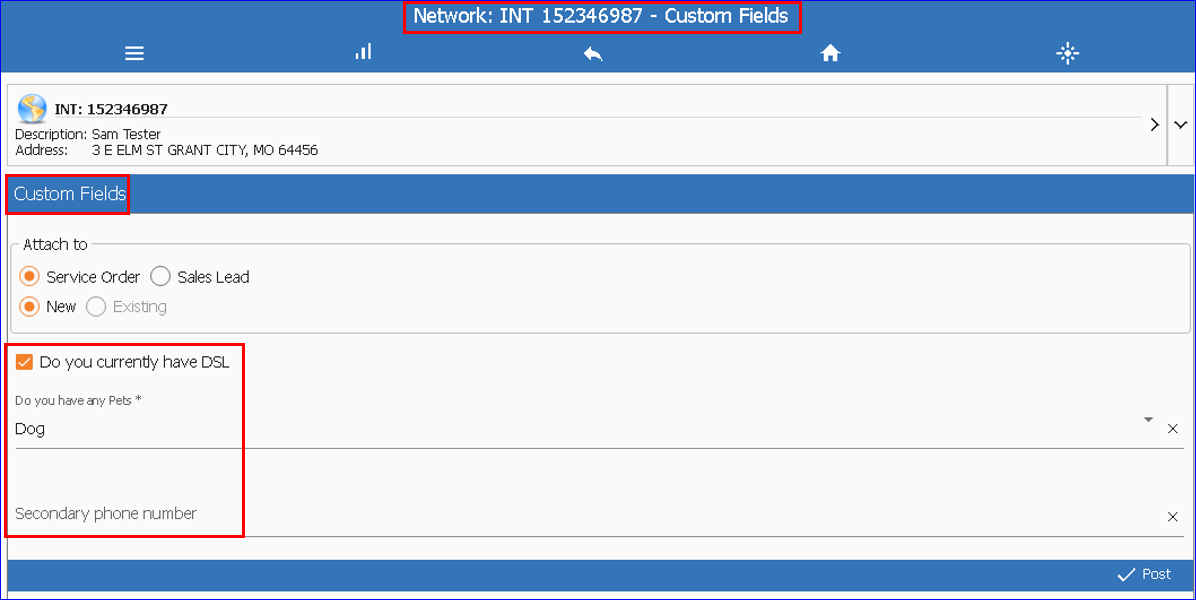
Trouble Ticket Editor | Custom Fields button: Trouble Ticket capabilities were expanded in Customer Master and MACC Mobile for companies utilizing Custom Fields in a Service Order. Custom Fields can now be edited from within a Trouble Ticket if the needed setup is in place (Maintenance | Service Order | Service Order Custom Fields.) For easy access in the Trouble Ticket Editor, a Custom Fields button was added to the toolbar.

