We are here to help! Call us at 1-800-622-2502 or send us a message.
We are here to help!
Client Central Home > Customer Master > 20.2 Customer Master Update Letter
Customer Master 20.2 Update Letter
Enhancements have been made to the Customer Master software application. Please take time to review these changes, which become effective with Version 20.2 of Customer Master.
This section of Client Central provides an overview of the changes made and added functionality included in the latest version of the software. Click on the Modules listed below in the table of contents for complete details. Each page refers to the changes by Module, followed by a brief summary of the enhancements included in that Module.
Customer Master’s online help has also been updated to include information on the latest enhancements. Please refer to the help documentation for an in-depth explanation of the enhancements included in this letter or contact your MACC Customer Master Software Support Representative. Web training sessions on these enhancements are also available.
Table of Contents
Click on each section to view content
Delinquents
No Penalty Option for Delinquents
A new “No Penalty” option is now available for delinquent accounts, so users have the ability to send a late notice to an account, but keep the account from getting a penalty. An Expire Date, Alert, and reports are available for accounts flagged No Penalty.
A No Penalty check box was added to the Credit Node of the Service Order, with a corresponding Expire Date drop-down calendar. When checked, the account can receive a delinquent notice, but will not get a late fee during the Penalties process. The Expire Date can be set to limit the amount of time the account is exempt from penalties.
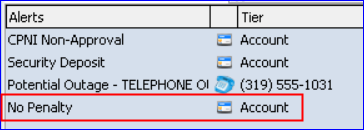
A No Penalty Alert is available for both Inquiry and Payments at Maintenance | Common | Alerts, and will display in the Alerts window for any accounts flagged No Penalty.
The Non-Zero Balance Report found in the report’s menu of the Delinquent process, contains a new No Penalty column to aid in identifying No Penalty accounts.
The Credit Attributes report, and the Grid Report – Account can be used to discover accounts flagged as No Penalty. The Credit Attributes report has a new group box for No Penalty Options, and the Grid Report – Account includes No Penalty, and No Penalty Expire Date selections
Maintenance
A New Premise Equipment Interface
MACC’s new Premise Equipment interface provides versatility in managing premise equipment to the customer’s address from one application, our Customer Master software. This comprehensive and time saving interface allows users to assign/store equipment on network addresses, pull equipment items directly from Accounting Master inventory, and provision the equipment (activate or change service) with their equipment vendor. This eliminates dual entry in multiple software’s, providing a seamless equipment process within Customer Master. Users who do not have the Accounting Master Inventory interface will also be able to assign/store CM Equipment as Premise Equipment on addresses in Customer Master. Note: If your company plans to use Premise Equipment, and you plan to auto-provision that equipment, please contact your Client Relations Manager or Account Manager to coordinate with MACC’s Application Interface team. Set up will be required.
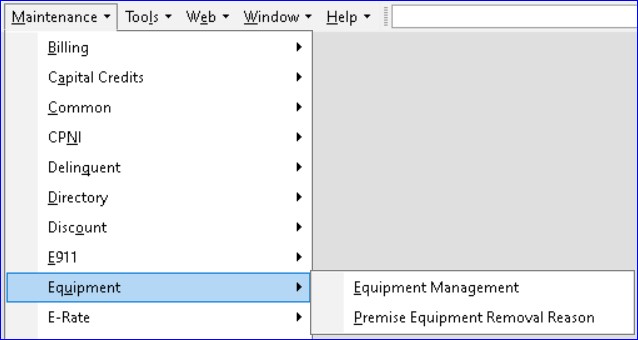
The Equipment menu has been moved from the Maintenance | Service Order menu, to its own menu item at Maintenance | Equipment | Equipment Management.
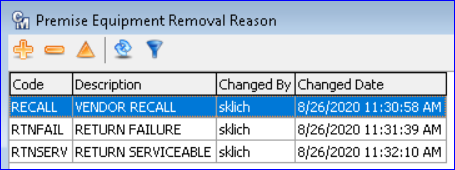
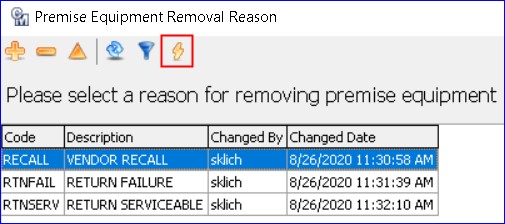
A new Premise Equipment Removal Reason has been added to the Equipment menu, and is the table to set up and store removal reasons for Premise Equipment. When deleting CM Premise Equipment, users will be required to enter a reason for the removal.
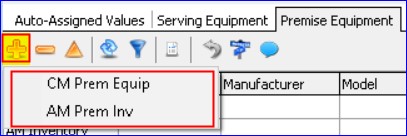
A Premise Equipment tab has been added to the Address Editor, with ability to manage and assign both CM Equipment, and AM Inventory Equipment to a service (network) address. This equipment is leased equipment only, with no POS transaction information. This table can also store CM Equipment as Premise Equipment for companies that do not use the Accounting Master Inventory interface.
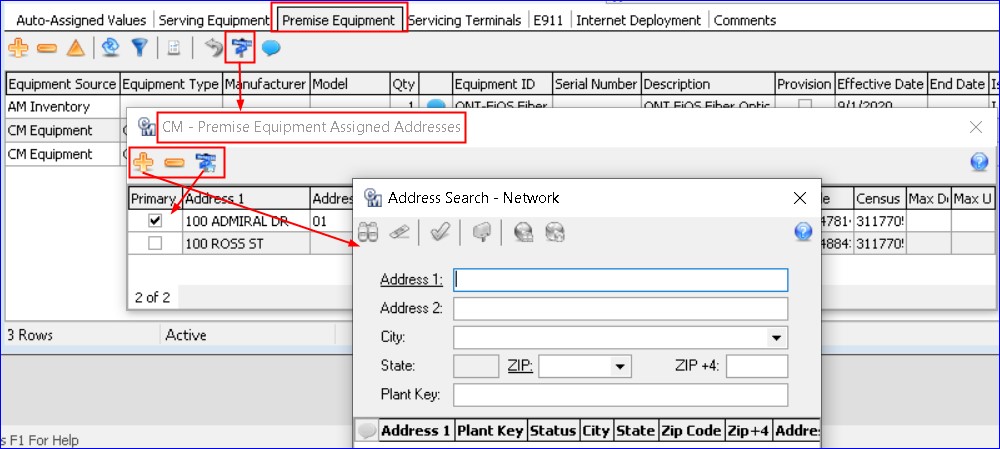
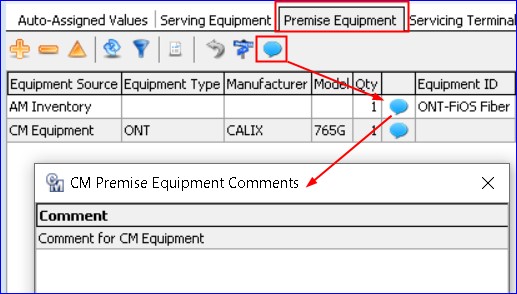
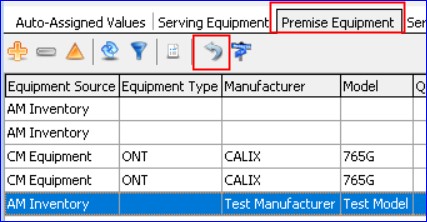
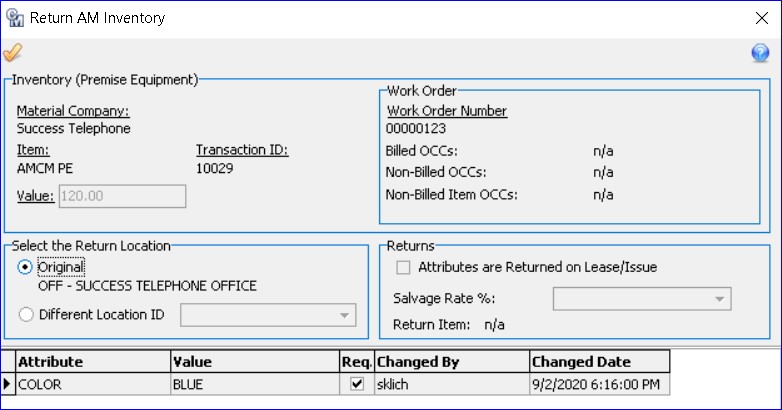
The toolbar buttons include functionality to Insert, Delete, Edit, Refresh, Filter active/inactive, Reports (Equipment Listing,) Return AM Inventory, Assign Addresses (multiple,) and add Comments. The grid can display both AM Inventory equipment, and CM Equipment with applicable rows/columns to show the equipment information. Right clicking on the grid allows the export of the grid for reporting purposes.
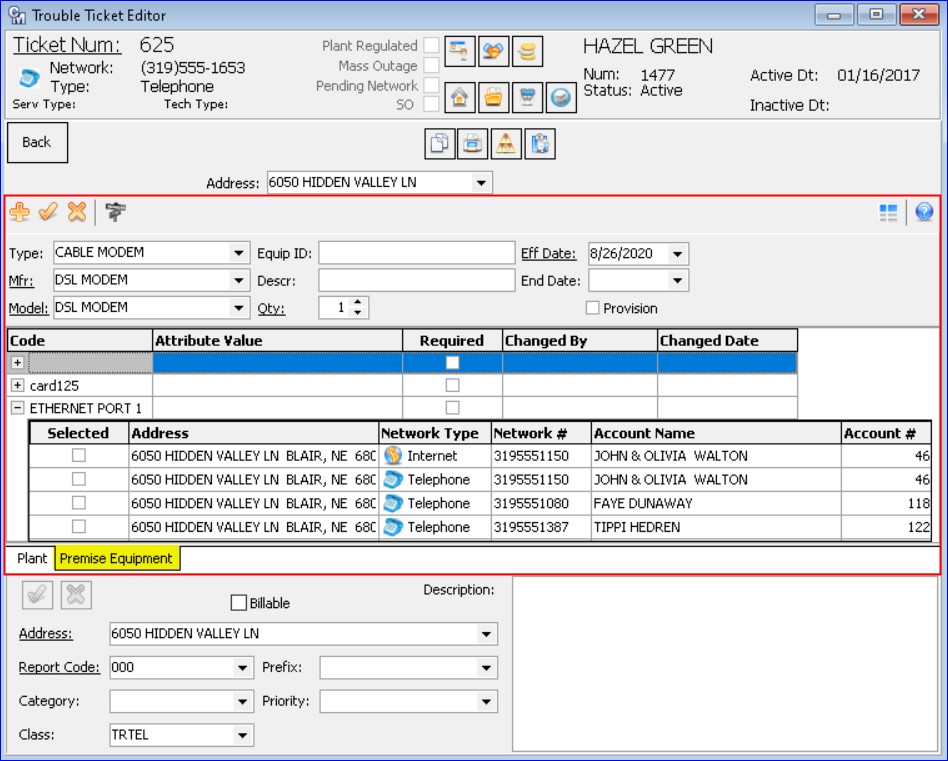
CM Prem Eq. option: The CM Premise Equipment option opens a window to select an equipment Manufacturer (Mfr,) and Model from a drop-down menu, and once selected will populate the corresponding Type, a quantity of one, and todays date in the Effective Date field. Any attributes assigned to the selected Manufacturer/Model will display in the grid, and clicking the plus sign next to an attribute will expand the grid to display all networks assigned to that address. Any networks checked/selected in the grid, will be assigned the selected Premise Equipment upon post.
Toolbar buttons include Insert, Post, Cancel, Assigned Addresses, PE Equipment Comments, and Provision. A Provision checkbox can be checked to provision the equipment, and checking the box will activate the Provision button on the tool bar. If provisioning is set up with MACCs Application Interface team, checking a network, and selecting the Provision button will provision (automatically activated or change the selected attributes on the network) through the application interface, to the equipment vendor. If not, hovering over the icon will display a fly over message of “Provisioning Equipment Not Set Up.” The Return to Grid button on the upper right is used to return to the Premise Equipment grid.
Color-coding of rows in the grid show network addresses with a Tier status of Disconnected, Suspended, and Active, as well as networks with addresses in a pending state. The example below shows a Disconnected (red,) Suspended (pink,) and Active (gray) networks at the selected address.
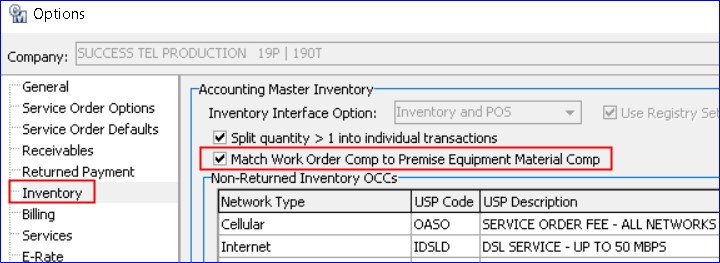
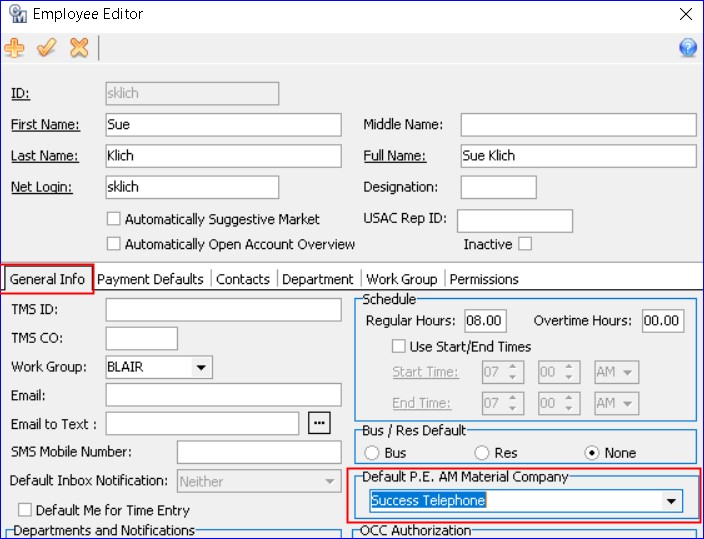
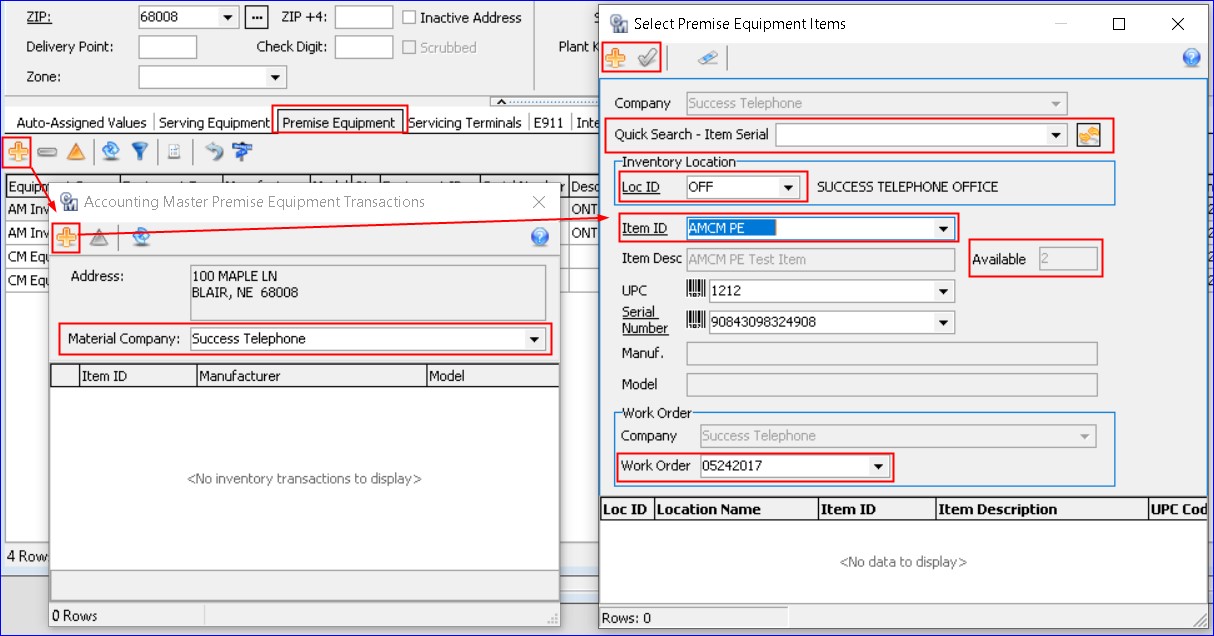
AM Prem Inv. option: Selecting and using the AM Premise Inventory option to pull equipment/items from Accounting Masters inventory has some setup considerations. At Tools | Options the existing Nii node was renamed ‘Inventory’; and a new option called “Match Work Order Comp to Premise Equipment Material Comp” was added to the Accounting Master Inventory group box. When checked, and issuing inventory for premise equipment, the selected Work Order should match the Work Order Company to the Material Company, and prevent users from selecting an incorrect work order company number. Note: The Work Order’s Company, Number, and Description will be stored with the issued inventory.
In the Select Premise Equipment Items screen, a Quick search–Item Serial field has a Change List Field button on the right, used to toggle between Item Serial or Item UPC, depending on the users searching preference. The Loc ID, and Item ID field can also be used to search for items from a particular Inventory Location, and only AM Inventory Items that are marked for Premise Equipment in Accounting Master will be available for selection. When a selection is made from these search fields, the other fields will populate/pull in from Accounting Master. The Available field indicates how many of the selected items are available at the location. If this number is zero or less, you cannot save the item to the grid. The Work Order dropdown will contain all open work orders for the selected company, and when selected will tie the Item to a Work Order in Accounting Master. Clicking the Insert button loads the Item to grid below, and post adds the Item to the Accounting Master Premise Equipment Transactions grid.
Note: Please refer to the Accounting Master Update letter for further details of the Premise Equipment Interface functionality within Accounting Master.
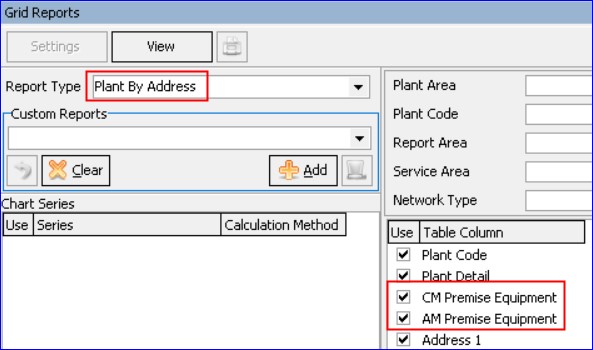
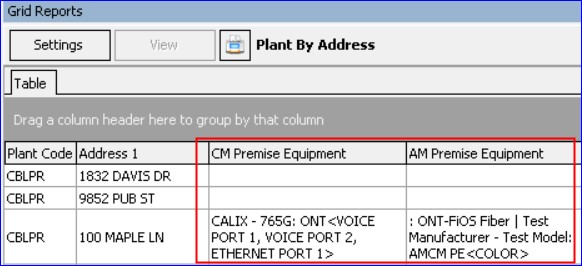
Premise Equipment can also be managed from multiple locations throughout Customer Master, with screens similar to the Premise Equipment functionality from the Address Editor. These locations include:
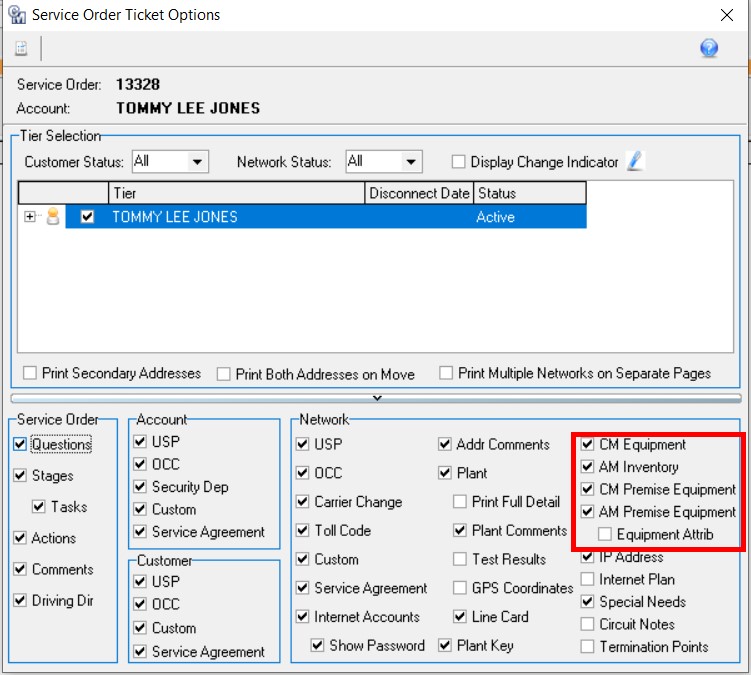
Plant node of the Service Order/Sales Lead: Premise Equipment tied to a service address can be managed in real time on the Plant node of the Service Order/Sales Lead. Premise Equipment fields were also added to the Service Order/Sales Lead Ticket Options screen so that Premise Equipment can be printed with the Service Order/Sales Lead.
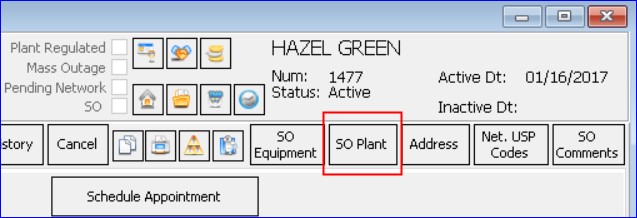
Trouble Ticket: Premise Equipment tied to a service address can be managed in real time from the SO Plant button in Trouble Tickets.
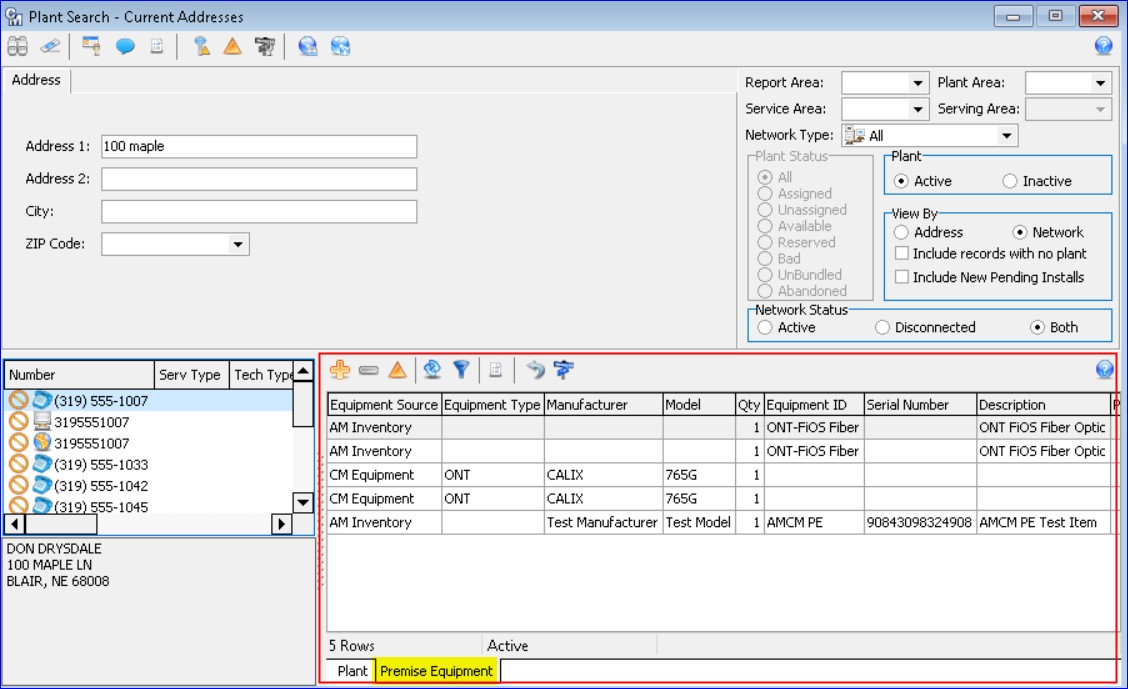
Plant Search: Premise Equipment tied to a service address can be managed in real time from the Plant Search screen.
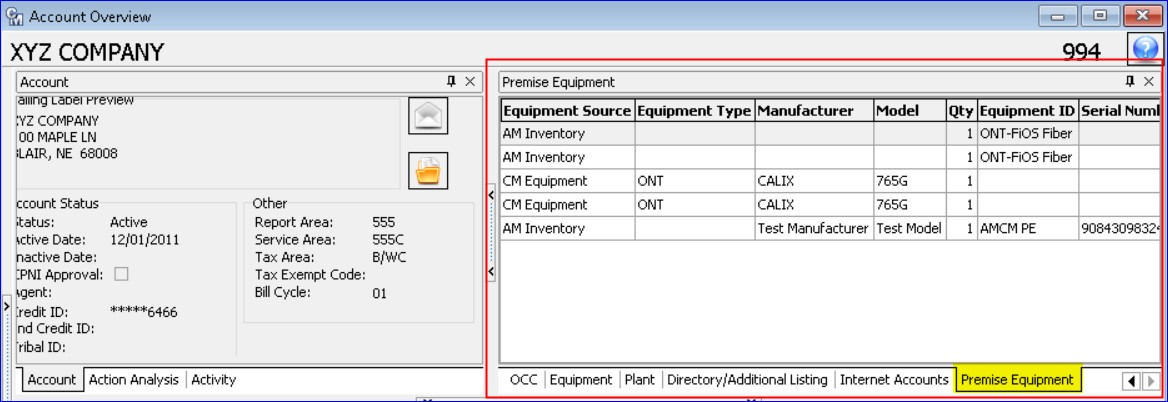
Account Overview: Premise Equipment tied to a service address can be viewed in the Account Overview, from the new Premise Equipment tab.
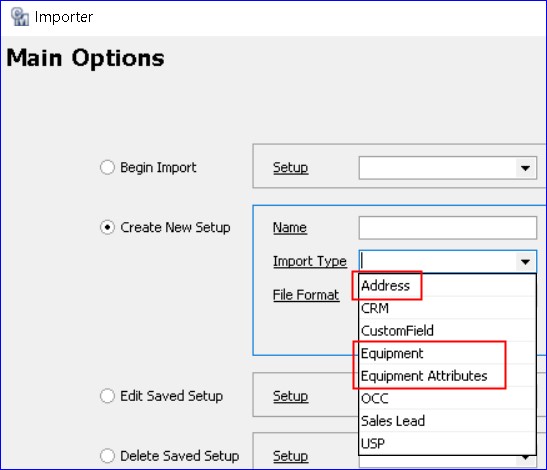
Importer: The Importer tool at Tools | Mass Processing | Importer was updated with the ability to add or update Equipment. The existing Address Importer has new Field selections that can be used to import Premise Equipment to addresses in Customer Master. Two new Import Types of Equipment, and Equipment Attributes were added to import CM Equipment data, and CM Equipment Attribute data onto the database from a spreadsheet.


